Showing posts with label KitchenAid Mixer. Show all posts

Menu Monday: P is for Peach Tart


We bought some locally grown peaches this past week, but then we both got sick and didn't quite feel like eating much, much less healthy snacks.  Some of them were getting a bit soft, so I decided I need to make something with them.  I thought about my peach cobbler, and then peach pie, but settled on peach tarts.  However, I didn't feel like making small ones, so I decided to try a RUSTIC PEACH TART.


RUSTIC PEACH TART

1 pie crust (I use the recipe in my KitchenAid mixer cookbook.)
3 cups peaches
1/4 sugar
4 tsp. flour
1/4 tsp. nutmeg
1 Tbsp. lemon juice
1 Tbsp. sliced almonds
milk

-Preheat oven to 375.
-Roll out pie crust on a cookie sheet so that it is close to 13 inches.
-In a bowl, combine flour, sugar, and nutmeg.  Add peaches and lemon juice; toss to coat.
-In the center of the crust, pile the peach filling on, but leave two inches around the edge.
-Fold up edges over filling, crimping as you go, so that it is flush.
-Sprinkle almonds over filling and brush milk onto the crust.
-Bake for 35-42 minutes until crust is brown.  Let cool on cookie sheet for 30 minutes.

[serves 8]

This was so good and only took about 30 minutes to prepare, and then I could pop it in the oven and go about my business!  The nutmeg flavor was subtle yet definitely left me dreaming of fall.  Next time, I think I will make a praline pecan topping to add as I saw that many of my peach pie recipes combined those flavors.  YUMMY!

What have you been baking lately?

 photo b1ec0eef-a9ee-48d9-87d2-1285feb7aa0c_zpsd6f56ab6.jpg

Eating at The Owlery

Hello to all my visitors from Kelly's Korner!  I guess I should start by explaining why our home is called The Owlery.  We actually live in a duplex, but it feels much more like a cottage:  you cross a wooden bridge to enter the top floor, the bridge and the trees around the bridge are covered in ivy, and there are three owl decoys on the side of our chimney watching over our house.  We felt The Owlery was a very whimsical, fun name--something out of Harry Potter, if you will--and so it stuck!

I LOVE our kitchen.  It is easily my favorite (or one of my favorite) part(s) in our home.  I spend a lot of time here.  (Zach's isn't much for cooking though he will help me.)  Some of my favorite things to cook include chicken pot pie with lots of veggies; cobbler; French toast; roast beef; red, white, and black bean chili; and Cadbury chip brown sugar cookies.  Right now, as I recover from my most recent Crohn's flare-up/surgeries, I am trying to incorporate more fruits and veggies into our diets by trying ones I have never had or liked, or cooking old stand-by's in new ways.  Enjoy a look around the heart of our home!

 We seriously have three or four times the amount of counter and cabinet space we had in our first apartment, which was a teeny-tiny three-room apartment in a dorm.  (Yes, a dorm!)

 looking into our dining area

 looking into the kitchen from the other side of the living room
I forgot to show that wreath last week; it's faux lavender and was on clearance several years ago at Target, where I buy a ton of stuff!

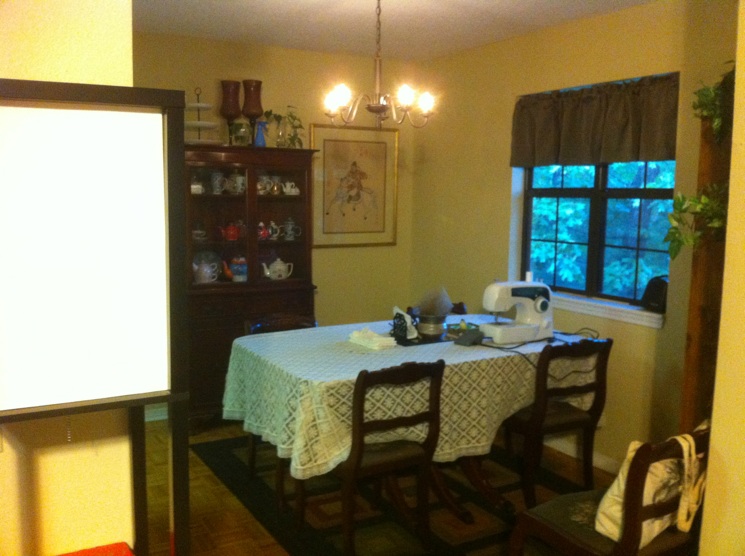
 Our table is an antique Duncan Phyfe dining table!  A couple from Zach's parents' church gave it to us when we got married because they were switching from two residences to one. It needs to be refinished, but it is just beautiful.  It seats six, but we keep one chair in our bedroom for sitting.  I love imagining all of the different meals shared at this table and all of the different people who have sat down at it.  Zach's Momo made the lace tablecloth several years ago and gave it to me for my birthday.  The vase in center was made by Zach's mom who is very into pottery.  All of the birdy items were gifts from my birthday week that Zach's mom organized this year since I was recovering from surgery during that time, and the ironwork napkin holder was a wedding gift (I don't remember from whom.)  The rug, which you really can't see, was purchased with wedding gift money.  And I'm a new seamstress!  Zach got me this sewing machine for Christmas last year!

 the original needlework on the dining chairs
We wish we had the money to restore them to their former glory, but we can't right now.  We are planning to cover them with some fabric to protect the needlework and better match our decor at some point.

 I keep cookbooks, photo albums, yearbooks, photo boxes, picture frames, and scrapbook clutter on this shelf.  It needs to be better organized.  Our Willow Tree collection that we received from my mama, Grandma Byrd, and aunts on my dad's side are on top of the shelf along with a decanter that has been in my family forever.  The Alice in Wonderland bag was a birthday gift from my friend Katie; I used it in grad school, but now it holds fabric scraps.

 This china cabinet belonged to one of Zach's great aunts and was given to us by his parents to use since they weren't using it.  It holds my teapot collection, including our Alice in Wonderland collection.  (Alice was one of the first books Zach and I bonded over when we met, and we had a Wonderland-themed wedding.)  The horse paintings were Zach's uncle's; he passed away before I met Zach.  :(  On top are some plants from my mom, a set of candleholders that were left in our first apartment, and the tiered serving dish that was a wedding gift from some ladies at Zach's parents' church.  Our kitties sleep on the ottoman to the right; we store coupons in the basket.
Oh, and our chandelier can be dimmed, so we have MOOD lighting!

 The barstools were a gift from my mama; I need to redo the cushions because they don't fit.  Do you see our vintage microwave?  This was Zach's Gigi's many moons ago that was passed to his parents and then to us because ours went out...and we would rather use an old one than buy a new one.  That is an Entergy sticker on the front; Zach's dad works for them, and I am guessing he took this to work at one time.  The cookbook holder on top actually came from one of my professors who teaches Women's Lit.  (Oh, the irony!)

Our counter is a little cluttered right now because I had to hand wash some dishes and we are eating our way through that tin of cookies and container of homemade 7-UP biscuits!  (We should put the chips away so I don't see them...and thus eat them!)  I love the brown ironwork Love-Hope-Dream plaques by the cabinet.

And yes, our bottle of brandy has a sweater on...

 our lovely stove, my KitchenAid mixer, LEGO timer and shakers, new toaster (Zach killed ours by trying to make a grilled cheese in it--don't believe everything on Pinterest), the fruit bowl made my his mom, and a lovely candle from my friend Emily

 our vintage fridge with invitations, "Thank You" notes, announcements, fun photos of family and friends, menus and coupons, and lots of LEGO and bottle cap magnets

 This is a peek into our laundry room.  I used that memo board when I lived at home and when I lived in college to hold photos of friends; now I use it to hold a few photos along with cards and invitations and recipe cards as well as a picture with my cooking idol, Linda Adams!  (She is Zach's dad's cousin and used to do cooking segments on local TV stations when I was growing up, and I always watched her, and my mama had her cookbooks.  She is an Arkansas gem and so sweet.  I couldn't BELIEVE it when I found out I was now related to her after we got married!  She sent me one of her cookbooks that is out of print as a wedding present.)

I am especially proud of the collage I am putting together above our trash and recycling cans.  I was frustrated by the thermostat because you couldn't hang anything above or below it without it being too high or low respectively or without the thermostat looking awkward in the middle.  I found the idea for the frame around it on Pinterest and did it back in the fall before I was getting really sick.  I did the yarn "P" right after I had my first surgery.  I found the black frame at Hobby Lobby on clearance; it had an "American's Heros" mat in it--it was military-themed--so I removed it and mounted this picture that I love of us from our first married Valentine's Day on scrapbook paper.  We finally added these two pieces this week.  I can't wait to finish it!

I hope you enjoyed a further peek into our home!  Sorry I am so long-winded and kudos to you if you made it this far.  :)  See you soon!

R is for RASPBERRIES

My husband LOVES raspberries.  I actually don't think I had eaten a raspberry until I met him.  Wild, I know!  I used to not like raspberry-flavored things, especially blue raspberry-flavored things.  (Are there such things as blue raspberries?  I must know.  I know there are red ones [obviously] and black ones and yellow ones...but blue?)  But then the husby got me into raspberries, and now I adore raspberry-flavored things (I'm talking artificial here--I even like blue raspberry Icees!) as well as real raspberries in jams and desserts and snacks and such.  Ah, raspberry jam is sooo good.  And real raspberries are very good for you.  For one, they are HIGH in antioxidant (cancer-fighting agents) as well as Vitamin C and fiber.  Raspberries also offer such vitamins as folic acid and iron, which is good for me because I'm always anemic or borderline anemic...and can use all of the help I can get.  :)


We got these raspberries at the Farmers Market from the blueberry man, and they were so tasty!  I reserved some for us to snack on, but we decided to use the majority of them in raspberry tarts.  I know, I know, that isn't quite healthy, but we wanted to bring something special to the Gates' for Memorial Day and decided to use our tart pans finally.  I figure, if anything, we will still get some fiber and some vitamins from these.  ;)  And the tarts turned out FANTASTIC.  :)


baking spray
2 pie crusts (I used my KitchenAid Mixer recipe I always use.  This will also leave you extra crust, so you can bake the scraps after sprinkling them with some cinnamon sugar.  MMM...)
1 whipped topping container lid (to cut the crust for 4-inch tart pans--you can top the tarts with whipped topping as well!)
2 cups cold water
1/8 cup cornstarch
1/2 cup sugar
2 cups berries (can reserve a few to decorate the tarts)
mint leaves

Spray tart pans with a baking spray.  Roll out the pie crust.  Place the container lid atop the dough and use a knife to cut around it.  Place crust in tart pan, pressing dough against the sides and trimming excess from top.

Pour the water into a pan and whisk in the cornstarch until it is dissolved.  Add the sugar and berries and boil until the mixture is gelatinous and clear rather than cloudy.  (This took a l-o-o-o-ng time.)

Pour the filling into the tart shells and bake at 400 degrees for about 20 minutes or until crust is golden brown.  Top with mint leaves, whipped cream, excess berries, or as desired.  :)

Menu Monday: SEASHELL SHORTBREAD COOKIES (and LOTS of pictures!)

Last month my sister-in-law Erin and her boyfriend of one year Josh got married on the beach in Biloxi, Mississippi. It was a beautiful wedding, and I was asked to be her matron-of-honor. When we were in Kansas City for my birthday at the beginning of May, I found some sand dollar and starfish cookie cutters at Sur La Table, and she asked me to pick them up. They were looking to serve finger foods, and I had suggested that perhaps they could give cookies as party favors. Later Erin asked me to make some cookies for the reception itself:


Rather than worry about icing melting in the heat or cracking on the drive down, I decided to dye the cookie dough itself. I used a family sugar cookie recipe from Linda Adams. Maybe you Arkansans remember her from Arkansas Today with Beth Ward and B. J. Sams? Anyway, she is a cousin of my father-in-law, and she released two cookbooks in the 1990s. We tried out her recipe at Christmas after our cookies the year before failed. They worked well, but I used icing on them, so they were sweeter. Unfortunately (in my opinion) these needed a bit more sweetness, and they were also rather cakey. I imagine that is because they were so thick and large I couldn't bake them for too long at once without browning them to bits. Zach liked them perfectly well, but I would have liked to approve on the recipe (which I did for my cousin's shower).

I used brown sugar as beach sand. It was sooo cute!

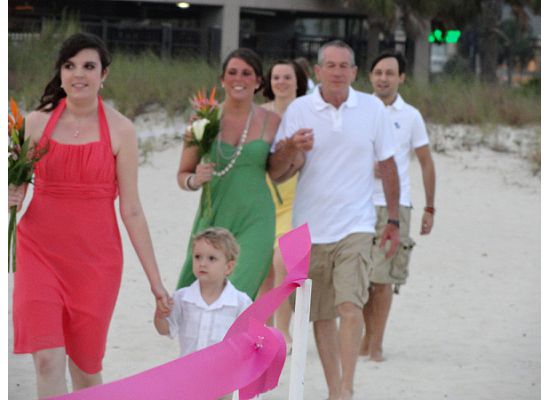
Here I am walking with the Best Man, Josh's son Sayer, who also happens to be our nephew now. Not everyone can say they almost carried their escort down the aisle!

my father-in-law Bobby escorting his baby girl

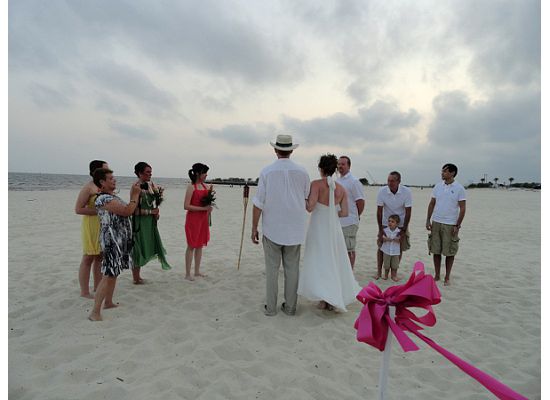
the wedding party and the presentation of the bride

Josh and Erin during the ceremony cousin Santa Alan performed
(He married us, too!)

The Dotson Family :)

Erin and her bridesmaids: Whitney, Genis (our former boss ;), and me

The Pharr Side of the family

an epic photo of the bride and groom

When I made the cookies for their wedding and posted them on facebook, my cousin Erin's best friend Laken saw them while she was in the middle of a movie and texted Erin about them. Erin's little sister Kristen is expecting a baby boy in August, and she is naming him Zachary. Confused now? *lol* Anyway, they were throwing Kristen a beach baby bash, and they asked me to make some more SEASHELL COOKIES. I still had some sugar cookies in the freezer, so I pulled those out, baked them for a bit until they were crunchier, and added a slight glaze of lemon juice and powdered sugar (and pearl dust) to make them sweeter. They were quite improved. :)

I also made some SEASHELL SHORTBREAD COOKIES, a recipe I used for New Year's Eve when Brian and Whitney visited. For that occasion, I added some caramel icing for a little pizazz. They were AWESOME with or without the icing. Fortunately for me, the recipe comes in two versions, almond and vanilla. This time I tried the vanilla, which uses brown sugar in place of regular granulated sugar.

-Start with 3/4 cup of softened butter and 1/4 cup brown sugar.
-Combine until creamy.
-Add 1 and 3/4 cup all-purpose flour.

-Add 1/2 teaspoon vanilla extract and mix until well blended. If the mixture is crumbly, add one or two more Tbsp. of butter to cause the form to stick to itself.

-Divide the dough evenly among separate bowls based on how many colors you are creating. (I was making four colors of cookies, so I used four bowls.) To make the cookies extra bright, add several drops of food coloring and mix until desired color is reached. It was much harder to do this with the sugar cookie dough because it was so thick and I used gel coloring rather than liquid. Do what is easiest for you. (I don't recommend using your KitchenAid or equivalent because you will have to clean it between colors, and I imagine it could dye your mixing paddle.)

-Once your dough is dyed, cover the counter with wax paper and flour. Also flour your rolling pin well, and roll your dough across the surface to pick up some flour. (I also sprinkle a bit on the dough.)
-Flour, flour, FLOUR EVERYTHING! I keep a plate next to my floured surface with flour in which I dip the cookie cutters between cutting and the spatula between moving the cut cookies to the cookie sheet. It's also import to use a metal spatula because plastic ones typically end up bunching or distorting the dough either on the surface, on the spatula, or on the cookie sheet.
-For cut cookies, roll the dough out about 1/4-inch thin and use a cookie cutter dipped in flour to cut out shapes. Use your metal spatula to transfer cut dough to an ungreased cookie sheet. (The recipe upon which I based my directions said to roll them out 1/2-inch thick and bake for 10-12 minutes at 400 degrees. But the recipe also stated it produced two dozen cookies, but I haven't found that to be so when they are rolled 1/2-inch thick.)

-Bake for 6-8 minutes at 375 degrees. WATCH THEM CLOSELY. It may take more or less time depended on your oven. Smaller cookies take less time, larger more. They burn quickly, so be constant. (I browned my first batch a bit much, which is part of the reason I pulled the leftover sugar cookies out of the oven because I didn't think I would have time to make more.)

-Cool them on wire racks. I mixed some Wilton pearl dust with lemon juice--you can also use a clear alcohol like vodka or rum--and painted the cookies for some shine. I used gold on the starfish and silver with white on the sand dollars. (When I made these for Erin's wedding, I didn't realize how much pearl dust it took to make the cookies shine, so I ended up pasting it on--and using a WHOLE bottle of gold before I realized that a little goes a long way with lots of lemon juice. *lol*)
YOU'RE DONE!!!

I had a blast seeing so many of my relatives and friends at Kristen's shower. I know she is going to be the cutest little mama, and it just cracks me up she is naming her baby Zachary. Good choice, eh? Here are some pictures from the day:

my SEASHELL SHORTBREAD and sugar cookies in the "sand"

the cake with peanut butter filling Laken stayed up until 5 a.m. making
(She used brown sugar as sand, too. :)

Grandpa and Grandma Byrd's tiki deck where the shower was supposed to take place
It was far too hot, so they moved it inside. I think we were all thankful, and the interior was just as cute as the exterior. :)
It is so weird that my Aunt Donna and Uncle Ronnie are now Grandma and Grandpa Byrd. WEIRD.

See? I told you it was CUTE! And look at those yummy fruit kabobs in the watermelon. My cuz-cuz Erin is so talented when it comes to party-planning. She helping with our wedding and reception and has thrown numerous parties, showers, and weddings/receptions over the years. They are always FABULOUS!

Kristen holding the present my mama (her Aunt Gracie), Zach, and I got her
I used ribbon from our wedding and was proud of how it looked. :) She was blessed with so many cute things for her baby boy Zach. He is going to be well-dressed! (We, however, wanted to make sure he was well-fed, so we got bowls, cups, and spoons. *haha*)

Byrds of a feather flock together!

with Rosey Posey, one of my former roomies
She (Ro-Ro), Erin (Er-Er), our friend Emily (Em-Em), and I (Ash-Ash) lived together for two years and came up with a (not so) secret sorority. *lol*

Rose said we are now Omicron alums and shouldn't do these things in public anymore. We definitely got the attention of EVERYONE in the room!!!

a sweet picture of the OOO's (We missed Em-Em, though!)

cousins :)

Menu Monday: BLUEBERRY-STUFFED SCONES

I may have mentioned this before, but we really love eating breakfast for dinner around here. For example, Saturday night I made buttermilk waffles with buttermilk syrup (thanks to the ladies at The Pretty Life Anonymous) and turkey bacon. Breakfast foods are filling and cheap and are sooo enjoyable to eat. Besides, who has time to eat a nice big breakfast in the morning? Mornings are hectic around here; we are lucky to eat at all (but Zach and I both do). We also like to have breakfast as a quick fix for dinner or an easy meal to make when we are busy or are preparing to travel, as we are this week. We are going to Brickworld outside of Chicago because my husband loves Lego, and I love my husband. ;) (Plus it's going to be pretty awesome AND our friends Rob and Mechelle are going. I really am excited; I promise. I just think Mechelle and I are more excited for Giordano's pizza. ;)

Since Zach and I have met, we have shared plenty of scones. I have made some from mixes--the best ones bought at World Market on trips to KC--and I have tried several recipes. I made one using sour cream and orange zest the first summer we were together, and I remember we liked that one quite a bit although it was crumbly. The one I used on the morning of the Royal Wedding? Not so much. Tonight, however, I am happy to say I have found a scone recipe we both like, even though the scones it makes are somewhat different from the ones to which we are accustomed. By that, I mean that the fruit is an actual filling as in a fried pie or dumpling, rather than being mixed into the batter. I had quite a bit of buttermilk leftover from "brinner" this weekend, so I wanted a recipe that would use some of it up. Fortunately, I found a recipe in the cookbook that Zach bought me for our first Valentine's Day together. WIN!

We bought some more blueberries at the Farmers Market, so BLUEBERRY-STUFFED SCONES were born!
-Combine 1/2 c. all-purpose flour, 1/6 c. sugar, 1/2 tsp. salt, 1-1/4 tsp. baking powder, and 1/4 tsp. baking soda in a bowl.

-Add 6 Tbsp. butter or margarine and mix until the flour mixture becomes crumbly. (I used my KitchenAid [of course!] on the 2 setting.)

-Add the 1/2 c. buttermilk until combined. It will be very sticky.

-On a floured surface, tear off 2-in. diameter portions from the dough and roll the dough out into circles that are about 4 inches in diameter. (I suggest flouring the surface and rolling pin in between each circle, and it doesn't hurt to flour your hands, too!)

-Place 7-10 blueberries in the center. (You can use any kind of fruit, jam, baking chips, cheese, nuts, or what have you. Use your imagination. :)

-Fold the circle in half and seal edge. Place on a greased baking sheet and brush the top of the scones with heavy whipping cream. (I used Baking Joy every time I need to grease a pan or what-not for baking. My mama always used Crisco, and while that softens your hands, it sure is messy!)
-Bake for 15 minutes until lightly browned at 400 degrees.

-Sprinkle with powdered sugar while warm. (I wish I had used my sifter. They would have been that much prettier!)

[10-12 scones]

-I also made cheesy, chivy eggs to go with the scones for "brinner." Zach says I make the best eggs he has ever had, and he loves chives. The chives, rosemary, and basil are doing great in our herb garden. The mint is o
kay--some of the bottom leaves have browned, but it is growing upward and the top leaves are huge and green--while the cilantro just can't catch a break. Does anyone have any tips?

P.S. I'm such a nerd and just remembered how to imbed links! I'm proud--and embarrassed!
P.S.S. We are going to be gone until Monday, so no posts until next Tuesday at the earliest. The only food I will be talking about will probably be Chicago-style pizza and hot dogs!! I'm sooo excited about them.
P.S.S.S. I had radishes again this week in salad Sunday night. They are so nice and peppery. But can you cook them? I need to research that.
P.S.S.S.S. Someday, I promise, I will have a lovely camera that takes lovely pictures. Right now my iPhone will have to suffice. : /